SharePoint print forms
In this article I will demonstrate how to create a print form with SharePoint Forms Designer. I will use version 2.7.3 in which link and button controls became available as well as additional JavaScript functions for switching between forms.
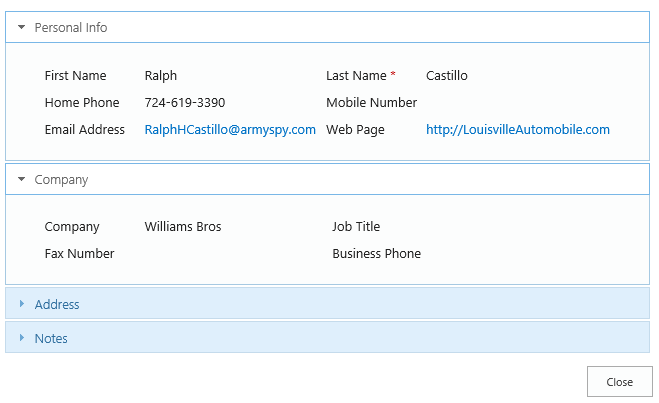
My display form is designed with accordion and has the following view:
But I would like to have another form for printing where all fields are visible and located one by one. To achieve this purpose I will create a completely different display form just for printing and put the link to navigate it from the default display form.
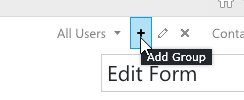
First, I opened Forms Designer and added a new group of forms:
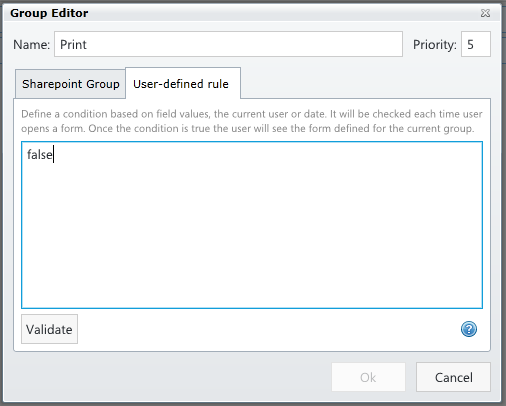
I called it Print and defined the rule as ‘false’. It means that the form will not be shown by default. Validate → Ok.
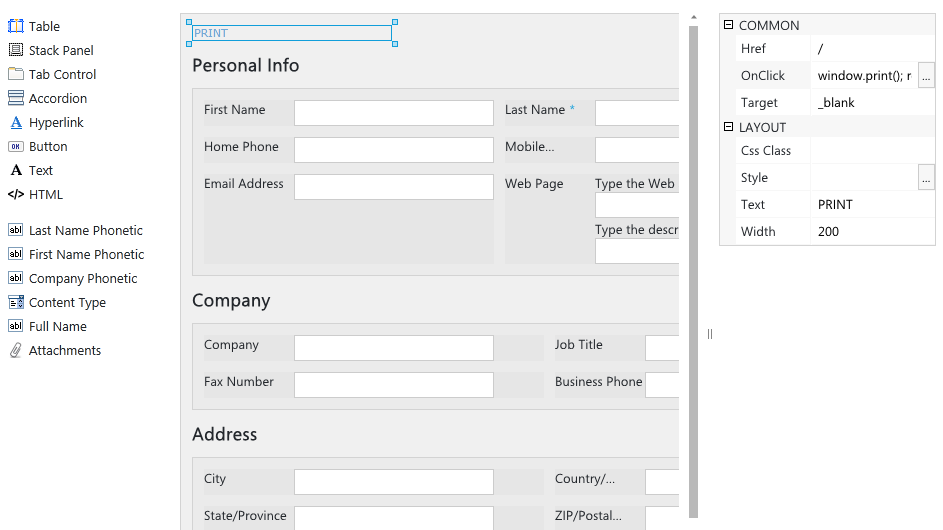
Next, I switched to the display form and designed it without accordion. I just put fields one by one and divided them with headers. I put link ‘PRINT’ at the top of this form and set its OnClick option in:
window.print(); return false;
You can define any JavaScript in OnClick option of button and hyperlink controls. This script is executed when the user clicks the link or button. In our case the current page will be printed when the user clicks ‘PRINT’ link. Now we have to place link in our default display form with accordion that will open our display form for printing.
I copied the filename of my print form into clipboard. You can find it in the left bottom corner of Forms Designer window:
Next, I switched to ‘AllUsers’ display form and put ‘PRINT FORM’ link at the top of it. In OnClick option I put the following script:
return fd.openFormInDialog('fd_Contact_ad98a766-7fd1-499d-a492-36a0826d285e_Display.aspx');Function openFormInDialog() of Forms Designer’s JS-Framework opens the specified form in a dialog. It was added in the version 2.7.3. There were added several other useful functions: openForm() that opens the specified form in the current window and backToPrevForm() that redirects to the previously opened form. For example, if you wish to open a print form in the current window, not a dialog, you can use openForm() function in the default form and put ‘Back’ link that calls backToPrevForm() function to the print form to allow users to return back to the default display form.
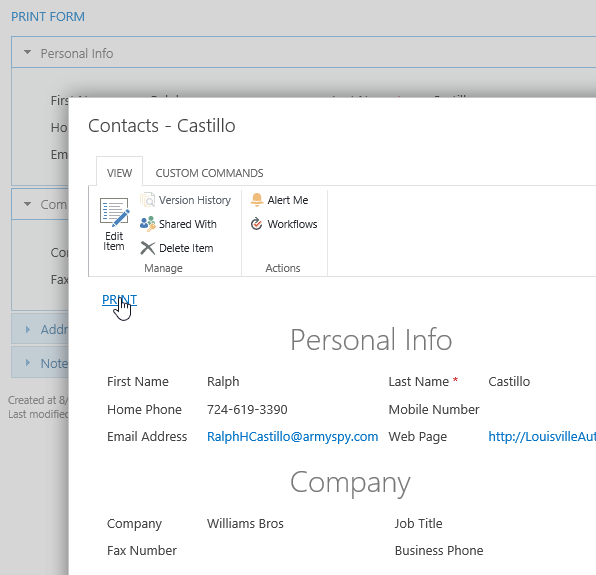
Ok, now when user clicks ‘PRINT LINK’ they will see a dialog with the print form. They can click ‘PRINT’ link to print it:
Office 365
The example above works perfectly for SharePoint 2010/2013 on-premises. But currently Forms Designer for SharePoint Online in Office 365 does not support groups functionality. Here I will show you a workaround.
First, we have to design the display form for printing as described above. When it is ready, save it and open the current list in SharePoint Designer. Here you can find forms designed with Forms Designer, they contains ‘fd_’ prefix:
Rename your display form to PrintForms.aspx. Now, open Forms Designer and create the default display form. Put ‘PRINT LINK’ into it and pass ‘PrintForm.aspx’ into fd.openFormInDialog() function. Now you have two completely different forms for viewing and printing in Office 365.
