Inline spreadsheet-style edit mode for the Related Items control on a SharePoint form
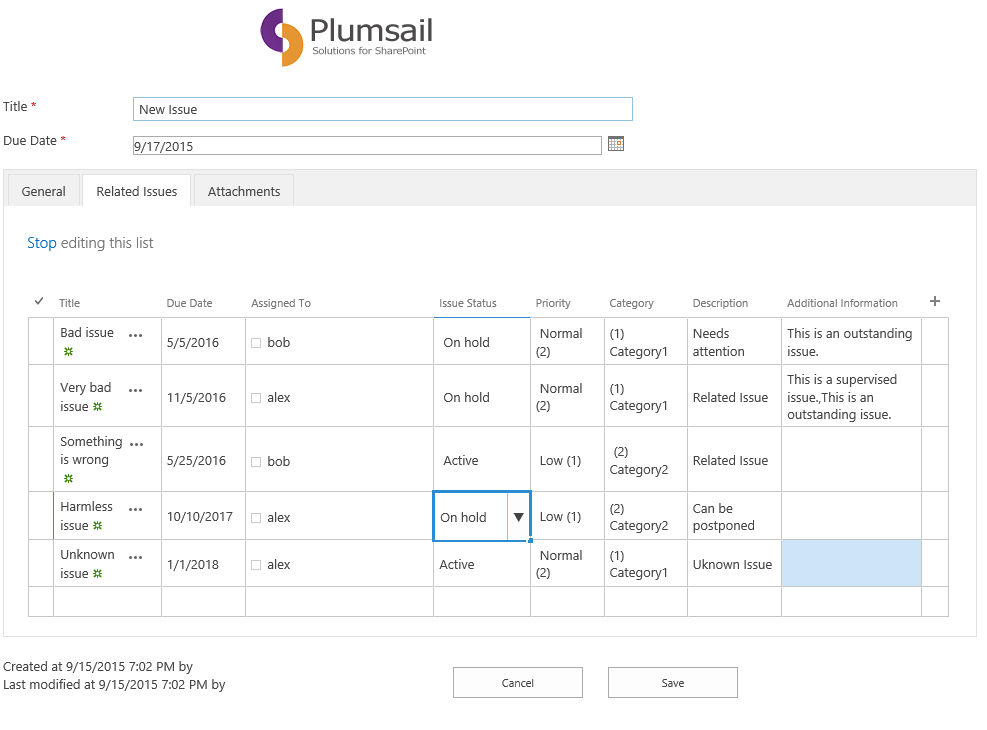
Forms Designer has just gotten a new feature: the related items control is now able to do inline spreadsheet-style quick editing. This feature is supported in SharePoint 2013 and SharePoint Online in Office 365. It looks like this:
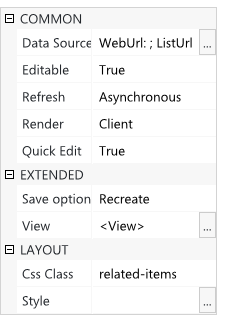
This mode is available when the render mode of the control is set to ‘Client’. When it is, the ‘Quick Edit’ mode cell in the properties window is enabled, and you can select ‘True’ to enable the mode on the control.
The JavaScript framework has also received a function to auto-fill empty cells in this mode. The name of the function is populateFieldsInGrid, let’s take a look at how it can be used.
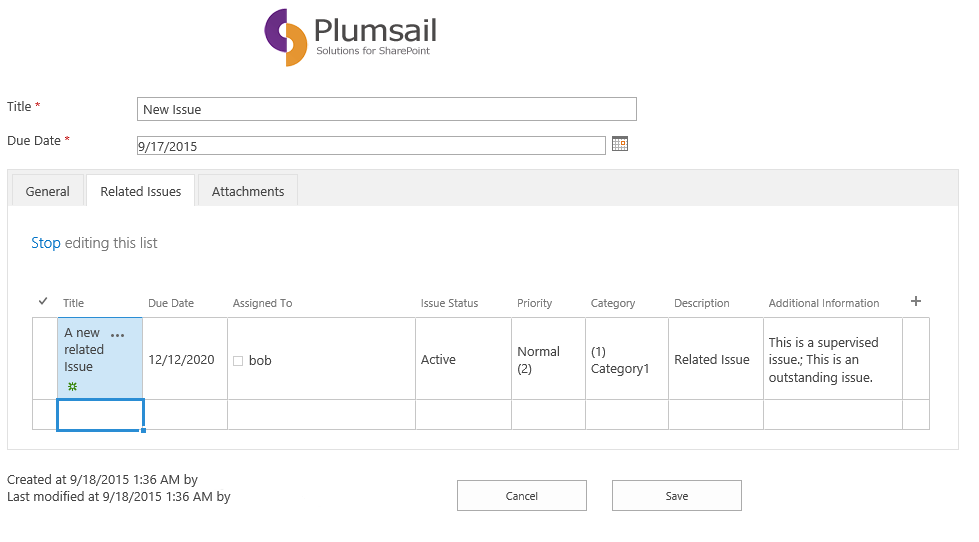
In the screenshot we add a new record and only fill in its title:
And then we click somewhere outside the row or press Enter, and the record gets saved with some default values that we specified in our JavaScript function:
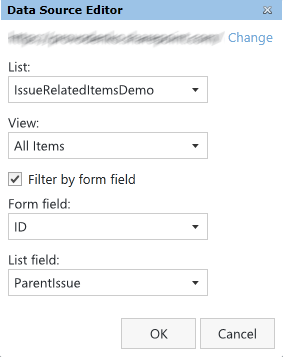
The related items control is set to filter items that are only related to the current issue, so what we want to do is set the parent of the new related issue to the current issue, and do it implicitly, behind the scenes.
The way to accomplish this auto-filling functionality is to add a snippet of code to the JavaScript editor and add a CSS class name to the related items control (please note that fields you’re trying to fill in with this function don’t have to be present on the form, like ParentIssue isn’t present on the form but is still filled in by our code).
This is our code:
fd.populateFieldsInGrid($('.related-items'), {
Due_x0020_Date: '12/12/2020',
Assigned_x0020_To: _spPageContextInfo.userId,
Description: 'Related Issue',
Priority: 'Normal (2)',
Additional_x0020_Information: 'This is a supervised issue.',
ParentIssue: GetUrlKeyValue('ID'),
});
And we’ve also added ‘related-items’ CSS Class name to our Related Items control (in the properties window of Forms Designer).
In populateFieldsInGrid function above we specify:
- A jQuery selector that contains the Related Items control. You can specify an arbitrary CSS class name in the properties and build the selector based on this class as we did in our sample.
- A bunch of fields and their default values. (Note that the field names must be correct InternalNames, found under ‘InternalName’ in the properties window).
- Due_x0020_Date: a date field. Use the date format that is set on your SharePoint installation (the same format you use when you enter your dates manually).
- Assigned_x0020_To: a single user field. You can either set the value of such field by id of the user, or by his display name (in this case the format must be ‘-1;#DisplayName’), or by his email (same format ‘-1;#EmailAddress’). Note the -1’s here are literally -1’s, not some example ids.
- Description: a text field. Simply specify the text you wish to enter here.
- Priority: a single lookup field representing text. Specify textual value of the desired entry.
- Additional_x0020_Information: a multi check box. Enter exact textual values of yours choices, separated by a semicolon and a space.
- ParentIssue: a single lookup field to the ID field. Specify the ID value. In our example we use GetUrlKeyValue(‘ID’) function to get the ID of the current element.


