Handling issues with forms containing a lot of fields in Office 365
This article will address the most frequent issue that may arise from users due to a large number of active fields in a form.
The crux of the problem
Suddenly, at some point, instead of opening a form, you get an error:
“Unable to display this Web Part. To troubleshoot the problem, open this Web page in a Microsoft SharePoint Foundation-compatible HTML editor such as Microsoft SharePoint Designer. If the problem persists, contact your Web server administrator”
This error repeats intermittently if a form contains more than 70 fields.
You can find a detailed explanation of the issue in the following article. Forms Designer generates XSLT-code for DataFormWebPart web part which is processed on the server. We optimized the generated code as much as it’s even possible using all recommendations from the above article but if a form is very complex, contains a lot of field and containers, XSLT execution time may exceed one second and it will end with the described error.
Solutions
1. Switch some fields into readonly mode
This will reduce the execution time because server-side controls are extremely time-consuming.
2. Split the form into multiple ones with links to child forms on the master form
Create a general form with all fields in readonly mode and put links to separate forms containing less than 70 fields per a form with the help of form sets.
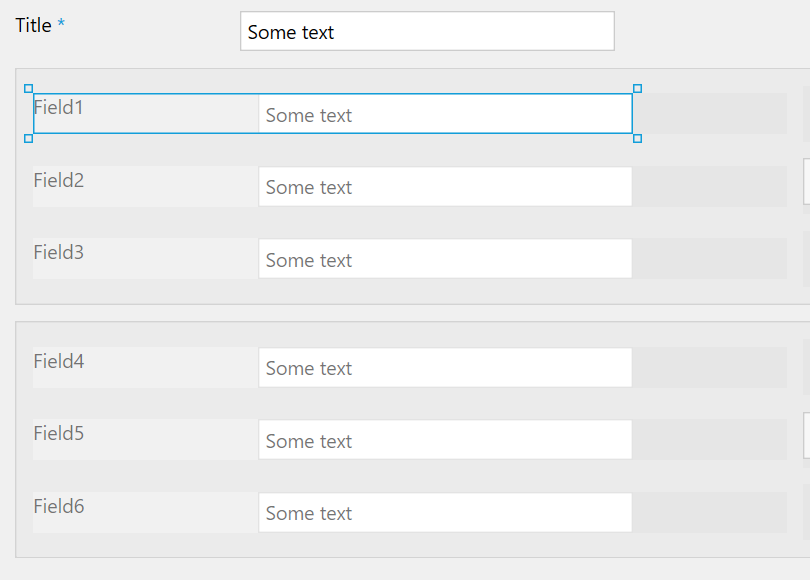
Let’s take an example.
- Here is a form we need to split into two parts. Fields 1-6 have a ReadOnly property set to “True”.
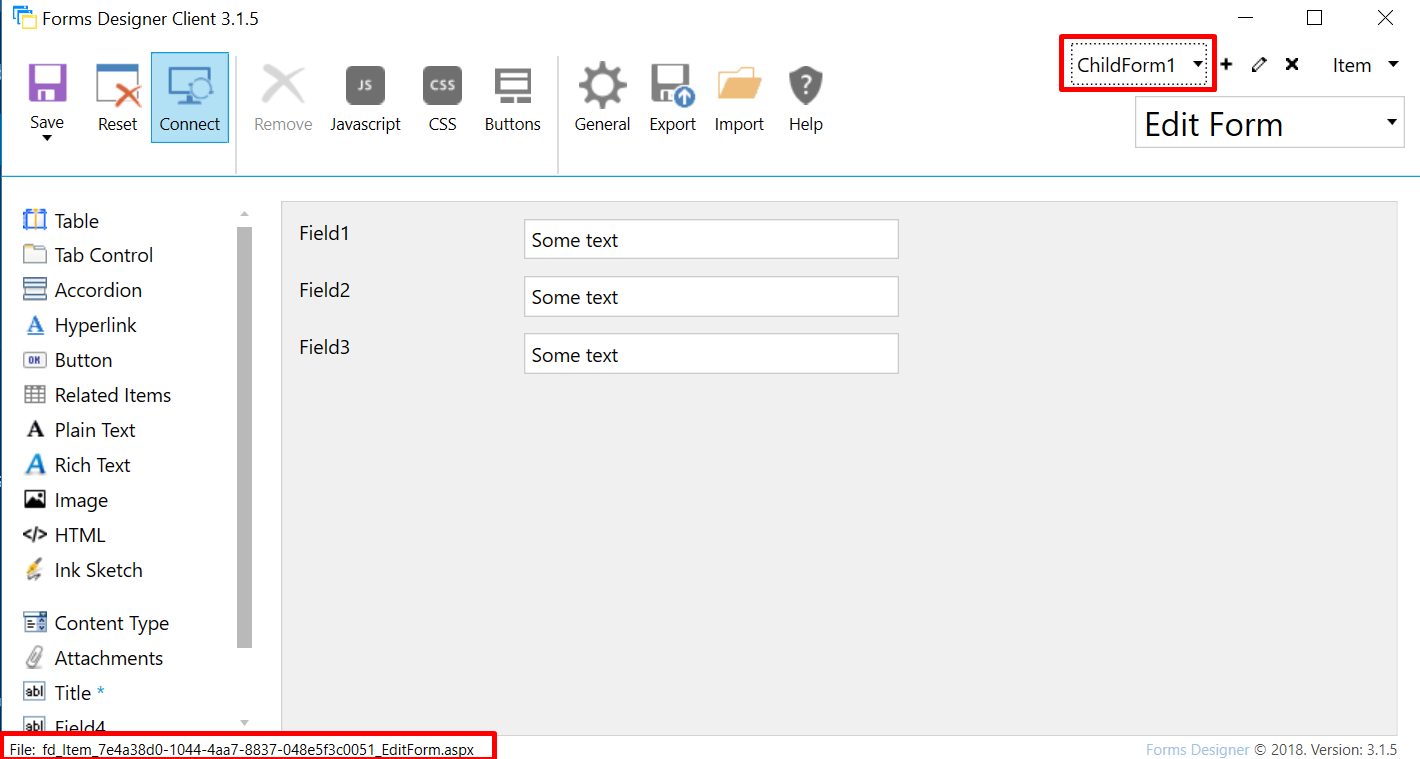
- Add Form Sets: ChildForm1 and ChildForm2. Save IDs of the child forms somewhere, we’ll need them later.
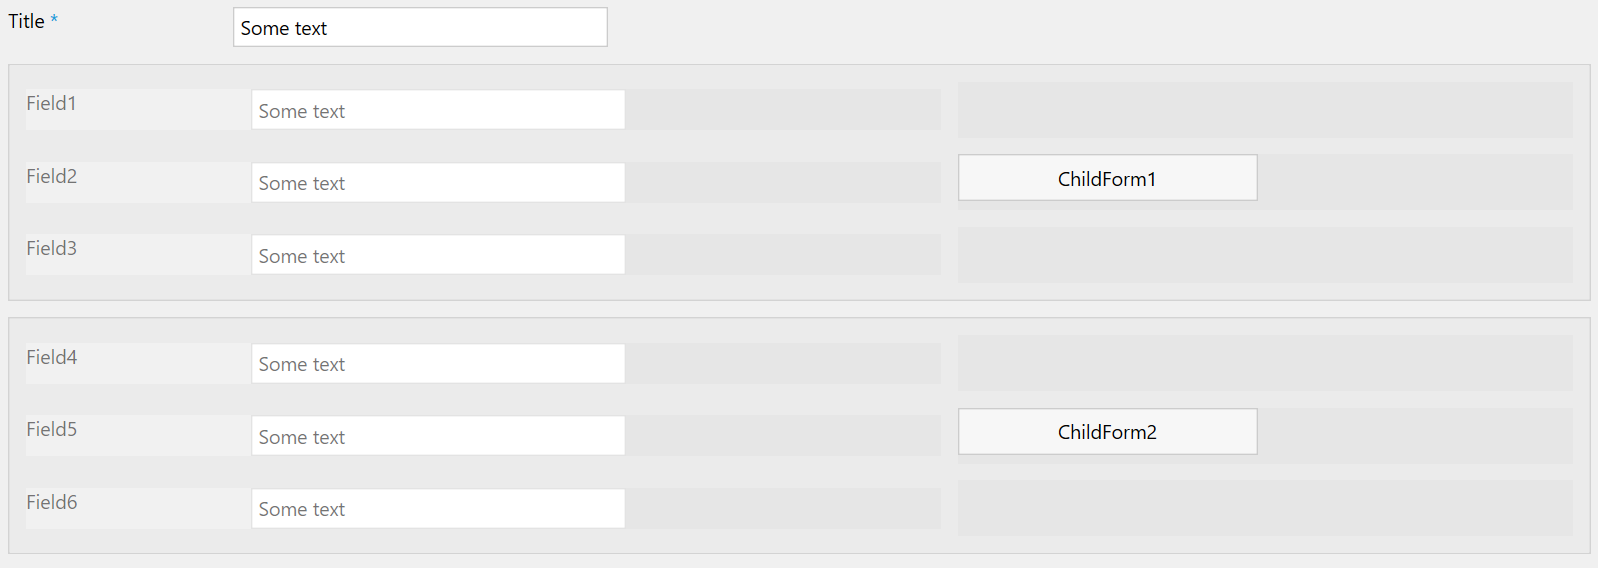
- Add buttons on the Edit form to access to the child forms.
- Add code opening child forms to the OnClick property of the buttons. Replace ‘ChildFormId’ in the code below with ID of the corresponding child form.
fd.openFormInDialog('ChildFormId');It should be like this:
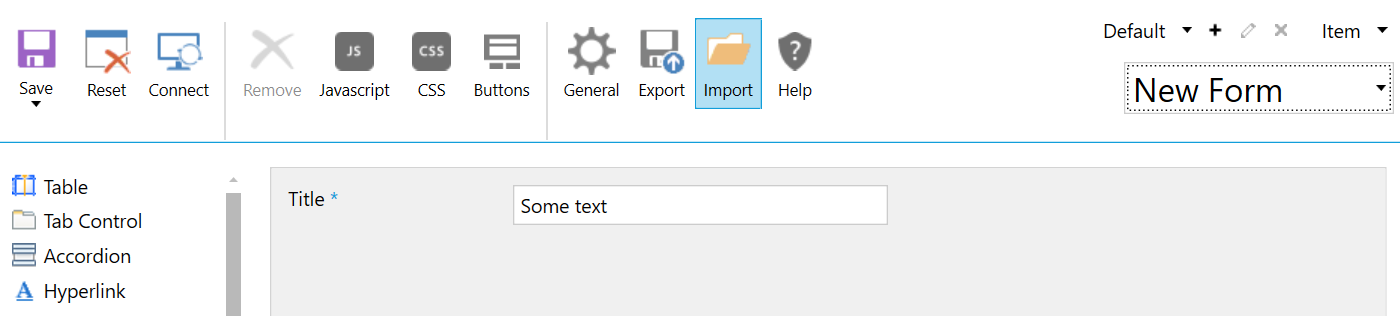
fd.openFormInDialog('fd_Item_7e4a38d0-1044-4aa7-8837-048e5f3c0051_EditForm.aspx'); - The described workaround cannot be used in a new form since an item has not been created yet and thus does not have an ID. So, first we need to create it by using a very simple form containing mandatory fields only and redirect users to an edit form right after saving.
Here is the code for redirection:fd.onsubmit(function() { var uri = fd.setUrlParam(decodeURIComponent(window.location.href), 'FDRedirectWithID', 'fd_Item_EditForm.aspx?ID='); fd.sourceFormParam(uri); return true; });
3. Use Plumsail Forms
This is a completely new product designed for customizing forms for SharePoint modern UI. It does not utilize DataFormWebPart or XSL-transformation and renders forms on the client side with VueJS and Bootstrap.
Hope these recommendations will be helpful. Feel free to leave your comments.